Categories
Container Gardening Garden Tips and Ideas Urban Gardening

Container Gardening: Top 10 Reasons To Grow in Containers.

I love container gardening. As spring approaches, now is the time I get all my containers ready and even do some spring growing. Container gardening can be a solution to many problems, and is quite enjoyable.

Container Garden

I am sure you have seen or read people talking about container gardening. This can be as complex as a raised bed garden or as simple as a window herb garden. No matter your needs container gardening can likely fill the gap in your garden design and grow season. So in this article we are going to cover some of the basic uses and advantages of container gardening.

Space

– One of the largest reasons to start a container garden is space, be it an odd space or lack there of. You can build raised beds or design a container garden to fit in almost any area.


Soil


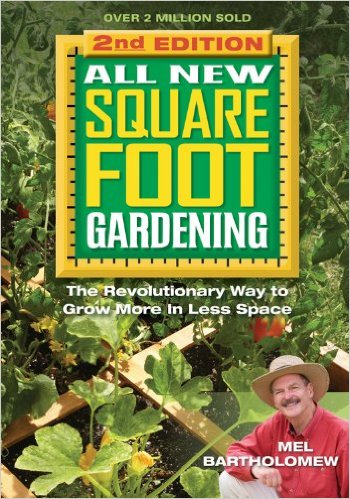
– If you live in the city, or even the suburbs your soil may be contaminated. Even if it is not it may not have a good PH or proper soil composition for growing in. You can test your soil for components like Ph, Nitrogen, Potassium, and Phosphorus fairly cheaply and easily with a home test kit. However other contaminants such as motor oil or herbicides like Round Up are commonly found in city yards and are harder to detect right away, and cost a lot more to test for. Container gardening solves this problem by letting you control the soil composition to a fine point. It can make gardening easier and also more productive. Books such as “Square Foot Gardening” can help you get the perfect soil composition.


Square Foot Container Gardening


Water

– If you live in a region where water is scarce, container gardens and hydroponic gardens can be water saving solutions for the home vegetable grower. They take and hold water at a better rate than watering a whole garden patch.


Children

– If you have children, you can do SO many projects with them. They will find container gardening easier for small hands and short legs, and they will find a great sense of responsibility and reward in caring for their own plants.


Run Off

– One of the bigger problem with many urban gardens is runoff. When nitrates and other fertilizers are leached by rain, they tend to run into sewer and river systems. This has caused dead zones in rivers and lakes, even the ocean. A lot of runoff is from lawns, so growing food in containers is one way to eliminate the lawn and to add home grown food to your diet.


Landscaping

– Container gardens come in all shapes and sizes, making them sometimes decorative. what a great way to add some decoration to your lawn while also growing some great fruits, vegetables or flowers.


Convenience

– You can grow an small vegetable or herb garden inside or out and have fresh cooking herbs at your disposal at any time. And if you live in a cold climate like I do, an indoor winter garden can be cheaper, easier to fit in a small space and easier than a greenhouse


Portability

– If you live in a rental home or just like to change things up sometimes, only container gardening offers the flexibility to move. You can rearrange, replace or move anytime you need to, with little or no losses.


Control

– If you have ever grown certain types of plants such as mint or strawberries, you will know they can take over a garden. Growing these in a controlled garden you can keep them to their own area and not have a whole garden of mint after a year or two.


Maintenance

– When it comes to weeding, I find that raised beds and other containers are MUCH easier to weed. This is also true if you need to change out or amend soils or anything else.


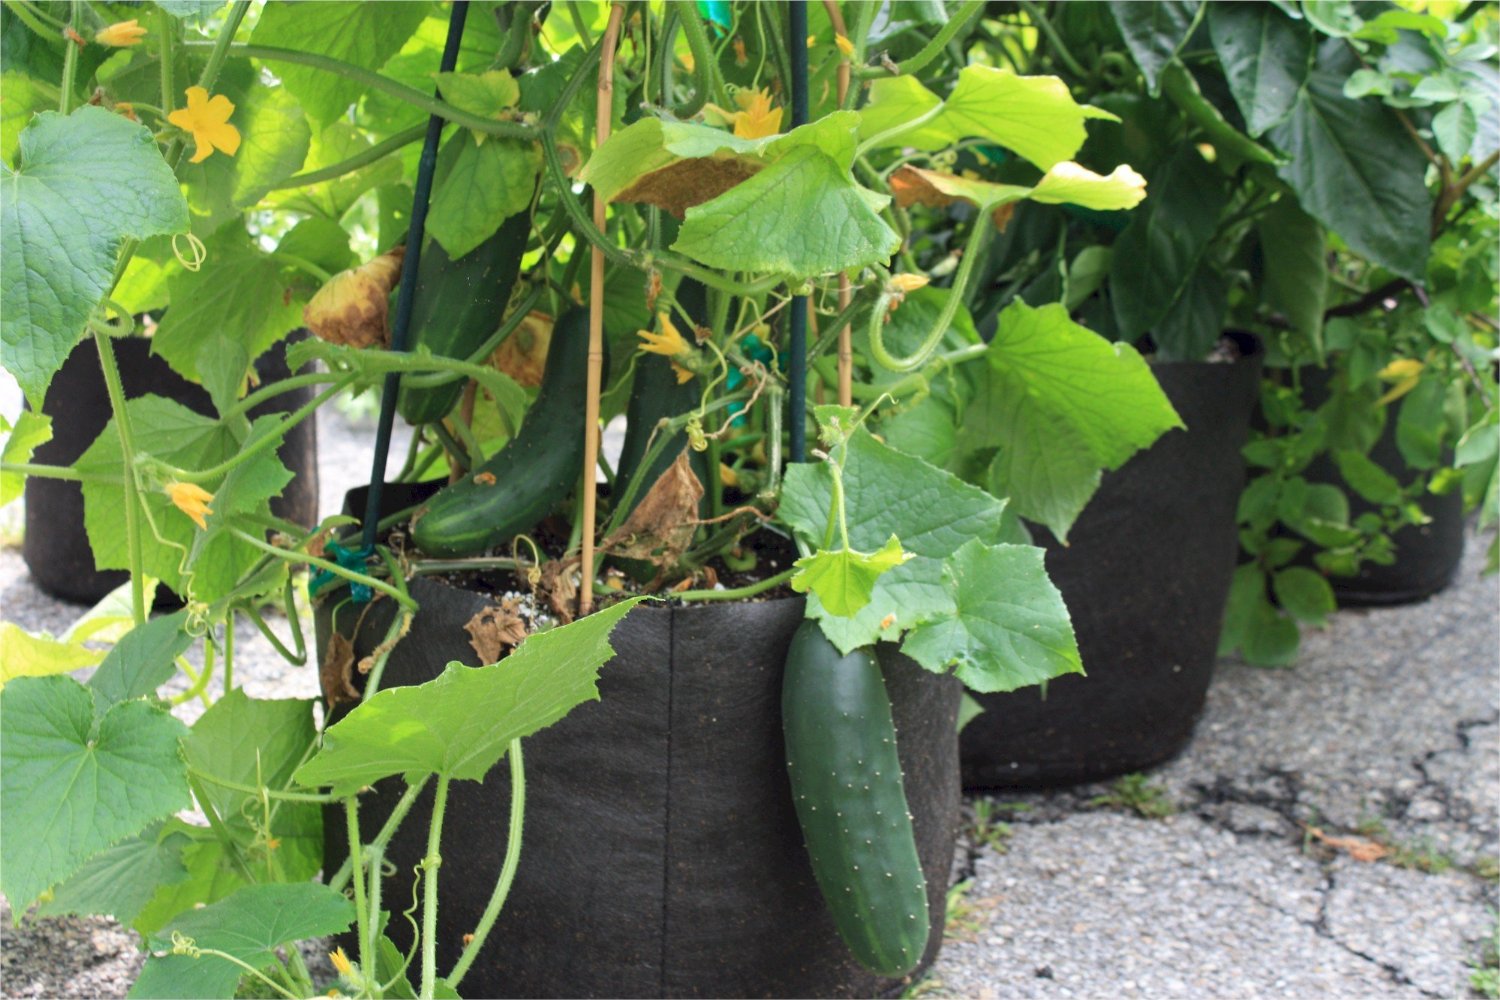
All of this does not have to replace in the ground gardening, but it can do pretty well. Container gardening is especially valuable for people who have limited space or no yard at all. So check it out, maybe get some grow bags and try it, but most of all have some fun and grow some food!

 

Categories
Agriculture Beneficials in the garden Garden Tips and Ideas Nature Organic Gardening Sustainability The Science Of Growing Urban Gardening

Azospirillum Brasilense Bacteria (Azos) And Why Every Gardner Needs It.

Once again this is an example of how one must feed the SOIL not the plant. Nature has already thought of everything you need and provided it somehow, all you have to do is learn to restore what has been lost. Many fungi and bacteria have been killed off by spraying and other pressures of modern Western life. So here is a knowledge bomb of one of the hardest working bacteria in your garden, and maybe on the planet,

Azospirillum Brasilense, commonly referred to as Azos or A.Brasilense, is one of the most well-studied plant growth promoting bacteria. It is considered a free-living soil bacterium that has the ability to affect the growth of numerous agricultural crops worldwide through the excretion of various hormones and the bacteria’s ability of nitrogen fixation.

Pull Nitrogen From Thin Air.

Even though you and I breath oxygen and plants breath carbon dioxide, the atmosphere is actually comprised of around 80% nitrogen which is in the form of N2 atmospheric nitrogen that is not conventionally available to plants. Nitrogen is a key component in growing anything. it drives chlorophyll production keeping the plants dark green and happy. It is a huge part of amino acids and other compounds that keep your plants strong and healthy. It is a part of every major protein molecule, and yet soil is often lacking enough N. Chemical fertilizer could provide this N, but they are expensive and can be dangerous.


Somewhere along the evolutionary development of the “Plant – Soil – Microbial Matrix”, certain bacteria began to specialize in tasks to enhance plant growth, which in return provided the microbes with a food source exchange opportunity.  A select group of bacteria classified as “Diazotrophs” began to supply nitrogen to plants from a range of sources, including decomposed plant litter, dead micro-organisms, and sequestration of atmospheric nitrogen.

Azos is a particularly efficient agent originally isolated in the Amazon Basin where the lack of soil, the reapid breakdown of any vegetation by hungry microbes, and the environmental conditions which require growth to survive is a fundamental proposition of the ecosystem. Azos specialized in the highly-efficient conversion of the N2 form of nitrogen into plant-available NH3 ammoniacal nitrogen. Azos is so efficient that between 50-percent and 70-percent of all the nitrogen required by most crops can be supplied by this organism. Azos benefit to plants is not limited nitrogen-fixation alone. Azos also acts as a growth simulant, catalyzing the release of a natural growth hormone in plants. This naturally-released hormone increases root development and optimized the harvest potential of your garden. Together, Azos and mycorrhizae fungi work symbiotically to help ordinary plants become the fullest they can be (read about mycorrhizae in this post).

Azos can be used as a cloning solution, though I have not tried it personally.

So grab some for your spring transplants and improve your crop this summer.

Categories
Agriculture Beneficials in the garden Garden Tips and Ideas Nature Organic Gardening Sustainability The Science Of Growing Urban Gardening

Top 5 Reasons To Use Mycorrhizae, Friendly Fungi And Fabulous Friends For Gardeners

Do you want way to naturally and organically produce more food from your garden or farm. Well, nature provides. Mycorrhizae is a fungi that will rock the roots of most plants and show a HUGE gain in size and yield. In combination with Azos bacteria, the two can nearly grow a plant in anything. So here is some info and The Top 5 Reasons To Use Mycorrhizae.

Top 5 Reasons To Use Mycorrhizae In Your Garden.

5. Can give your plants up to 10000% more root mass (yes 10000%!)

4. It makes a plant heartier and more resistant to drought, pests and disease.

3. Use less water to grow even better plants.

2. Use less compost and fertilizer, meaning less work, energy and waste go into your garden.

1. Plant yield and growth will explode!

Runner Up: They look really cool when you see them pop up on your seedlings.


Mycorrhizae (or Myco’s for short) form a mutually beneficial relationship with the roots of most plant species. Let me simplify the science. The fungus colonizes roots of plants and breaks down certain nutrients for the plant, in return for those nutrients the plant feeds the fungus the sugars it so craves, its just a fungus with a sweet tooth looking for its next fix, which it is willing to work for.  The mechanisms of increased absorption are both physical and chemical. Mycorrhizal mycelia, tiny little hairs which you can see on the roots, are much smaller in diameter than the smallest root, and thus can explore a greater amount of soil, providing a larger root mass for absorption of water and nutrients. While only a small proportion of all species has been examined, 95% of those plant families are predominantly mycorrhizal. And here is the real kicker, it may be myco’s that allowed waterborne plants to move to the dry land many millions of years ago!

Mycorrhizae should be everywhere, but due to pollution, runoff, pesticides, herbicides and anti-fungal sprays, mycos are missing in many gardens and raised beds, not to mention all indoor potted plants that are started with sterile soil.

Two Types, Two Jobs, Too Easy

There are two types of mycos, endo and ecto. Rather than bore you with my poorly explained science, I will simply tell you that endomycorrizae are for most vegetable and fruit species in your garden (spinach and lettuce type plants do not colonize with it, though it will not hurt them either), and ecto are for a lot of trees and some flowers such as roses and orchids. I just generally get a mix of ecto and endo so that it can both colonize the plant I am planting and rebuild the soil by possibly colonizing other areas and plants.

Technically there is a third type, but it is for bogs and not commonly sold or needed.

You can spray on myco, you can use it as a root inoculate when you transplant or plant, or you can “drill’ a small hole in the soil and spray or sprinkle some in the hole for existing plants. The key is to get it in contact with the roots.

So have heavier yields with less fertilizers and compost for less than $20 an acre. And I will give you a little tip that the guy at the garden center may not. You can use a small amount of myco and culture it in your potting soil, use it in house plants and then put that medium in the garden when done recycling the myco or you can even grow your own with certain grasses etc, but I just find it easier to buy a box or two a year (about a pound) for our whole farm to use.

Here is a good video if you want more info, the more you know, the more you can grow.

Research shows that the lack of mycorrhizal fungi can create problems with many plants, shrubs and trees when they are growing in our gardens, so make sure you get some before this spring.


Categories
Garden Tips and Ideas Urban Gardening

I Never Knew That! -Sweetgum Balls

sweetgum ball

I Never Knew!

You know, the super magical thing about the internet is that it can make you the bearer of almost instant knowledge on just about anything. This comes in handy when you hang out with kids. The ‘aha, I never knew!’ moments are exhilarating.


For instance, yesterday I finally looked up ‘tree with spiky balls.’ Yeah, I giggled a little inside at the search terms. However, the search is long overdue; we’ve taken hundreds of walks in our neighborhood and have run into the same patches of ‘spiky balls’ countless times. On our typical route, there are 3 trees that bear these weird little balls. I’ve twisted my ankle on them more than once; when I’m pulling a wagon full of kids, they can make travel difficult; Simon has crashed his bike more than once when his front tire hit one. Despite these nuisances, we always slow down to take a look, and to collect the unusual alien balls–we always end up with pockets full and fists bulging because they really are just amazing things to study.


Sweetgum tree with seeds


It wasn’t until yesterday, after a walk along the snowy sidewalks when we gathered a few of these funny spiky sweetgum balls, and Noah said ‘What are they called?” that I decided it was time to find out! Incidentally, he has become so fascinated with all the things in our compost, that he added “Can we put these in our special trash to turn them into dirt?” We are always in need of brown stuff (carbon rich things like dead leaves and straw), so I was thinking, hmmm, maybe!


Turns out, they are the seed pods from the sweetgum tree. Green in the spring, they darken as autumn and winter pass, and they fall from the sweetgum by the hundreds. If you look very closely, they are actually a bit scary looking–they appear to be made of a collection of tiny, dark brown bird beaks. Noah is the one who make the beak connection, and once he did, he was too freaked out for awhile to touch his ball again. He got over it. 🙂


Noah and sweetgum ball


Here is something interesting to pass along: The sweetgum doesn’t even start producing the seed pods until they are TWENTY years old! That will widen the eyes of any curious kid!


Six Great Things To Use Sweetgum Balls For:

The spiky seed pods from the sweetgum tree are not only fascinating to look at, they can actually help out in the garden. Who knew?! Go out with a bucket and fill it with seed pods, and in the spring you may just use some:


1. Lay the seed pods around young plants to deter snails and slugs who would rather not tangle with them


2. Put them around plants that you also want to protect from rabbits (press the spikes in the ground a bit so they don’t blow away)


3. Use them as mulch (you can’t have too much mulch!)


4. Like Noah suggested, you can always throw them in your compost for some much needed brown material. However, they will take a long time to compost


5. Use them in the bottom of planters as the drainage filler instead of stones


6. If you have hard, compacted soil that you are trying to amend, dig deep and place a thick layer of the seed pods down to help aerate and drain–cover back up with soil and other amendments


The pods would also be great for making wreaths or ornaments. They have a natural beauty to them, even if they do look like weird little baby bird beaks.


If you walk by a sweetgum tree like we do almost every day, now you know they can be useful for more than twisting your ankle or causing a bike wreck!


P.S. If you are feeling really motivated, get on ebay and sell some like these folks are! I’m totally kidding. Maybe.

Via: Andrea @ Little *Big* Harvest


Check ot other posts in urban gardening.

Categories
Using your Harvest

The Easiest Tomato Sauce You Will Ever Make


Do you have end-of-the-season tomatoes languishing on the counter like I do? This is the perfect way to use them up, and save them from going into the compost. The method also works well during the summer when you have a glut of tomatoes that are on the verge of going bad and you need to use them up quickly, without hassling around with skinning them and canning them. Because of all the additions, this is not a sauce you want to can, but it freezes beautifully.

Cut the yucky off, and the bottom will be perfect


Let’s face it; those last minute tomatoes are not really very appetizing. They might have been through a freezing night or two. You collected them even though they were green and hard, hoping that they’d ripen to a somewhat tasty tomato, but the chances are slim. Once they have ripened a bit inside, they may taste a somewhat like a store bought tomato, or even less flavorful…but they will never be a luscious, juicy beauty queen like all those tomatoes that came in all summer long.


A couple apples in a bag full of end-of-season tomatoes…


In hopes they will ripen up a bit!


This method will transform those sad tomatoes!


Sorting out the red from the hopelessly green, from my paper bag


Hoping for at least 6 pounds of relatively ripe tomatoes.

I have thrown a couple yellowy and green ones in before, no prob!


The sauce is multipurpose; I like to use it in mid-winter pots of chili, mix it with spaghetti sauce for a flavor boost, and add basil and garlic for a tasty pizza sauce.


If you have a lot of green tomatoes coming into the house, use the paper bag and apple trick to ripen them up a bit. Some of the tomatoes may have bumps and bruises and holes, and for this sauce, that is perfectly acceptable.


After you have a good amount of ripened tomatoes, chop them up, cutting out any bad spots. Throw them all in a roasting pan.


Method #1, see below


Method #2, see below


There are two different methods to follow from this point on; the carefree, anything goes method I learned from Spring Warren in this book, or the specific instructions described by Joan Gussow in this book. Both of these women are heroes of mine, and I own their books, referring to them often.


The second recipe will blow your socks off, and become a sauce that can totally stand on its own, but I go to the first recipe when I don’t wanna mess with measuring. Both sauces are handy; however, I label them on their own, specifying YUM to indicate that it can go directly into our supper rather than as an addition (for example, I will put the plain glut sauce into chili along with equal amounts regular tomato sauce, or into pasta with equal amounts pre-made pasta sauce). I also call this YUM sauce because while it roasts, your kitchen will become filled with the most delicious aroma you’ve ever inhaled. Even the kids agree on this. I can’t think of a better way to end the year’s tomatoes; a fragrant, happy goodbye that fills the house!


Future pasta dishes and chili, yay!


1. Carefree Tomato Glut Sauce

Fill your roasting pan with 2/3 tomatoes and 1/3 other stuff. Other stuff can be peppers, eggplant, onion, garlic, fresh herbs, pears, plums (the sweet additions give a nice balance of flavor). Roast in a 400 degree oven, stirring every 30 minutes or so, until you have a big pile of mush. Let it cool, then blend the heck out of it. If the veggies lost too much moisture while roasting, add water while blending until you have the consistency you want. Mine always turns out pretty thick.


2. Tomato YUM Glut Sauce -with actual measurements and stuff

(source: adapted from the NY Times and This Organic Life)

Once you’ve tried the recipe, experiment with other veggie additions.


Preheat oven to 400 F.


Put into large roasting pan (I divide everything up into two 9×13 pans):


6 pounds tomatoes (chop them in half to prevent exploding tomatoes)

1 1/2 c. coarsely chopped carrots (optional)

1 1/2 c. coarsely chopped celery

1 1/2 c. coarsely chopped onions (can use green onions)

9 cloves garlic, coarsely chopped

6 T. balsamic vinegar

1 bay leaf (I break it in half to divide it into my two pans)

1 1/2 T. each fresh thyme, oregano, basil, parsley (or 2 t. dried)

1 1/2 t. salt

1 T. pepper (I used 2 t.)


Mix everything up a bit with your hands to evenly distribute the ingredients. Roast for 45 minutes until vegetables are soft. Let cool. Pulse in blender until it reaches consistency you prefer. Recipe says it will make 2 quarts, but when I make it, I get 2 1/2 quarts, which I freeze in 2-cup portions.


Categories
Self-Reliability Urban Gardening

Simple Steps for Saving Tomato Seeds

This is really so simple. I’ve included pictures for each step of the way, but don’t be intimidated; it takes so little effort!


If you have heirloom tomatoes, and you want to keep growing them year after year without having to buy more seed, try saving their seeds. Saving the seeds from your healthiest plants will help ensure you are giving future plants the best start in life; they will be more acclimated to the specific growing conditions in your garden. By saving seeds year after year from the tomatoes that perform the best, you are essentially doing your own natural selection.


The tomatoes we decided to save seed from: Heirloom Amish Paste,originally purchased from Baker Creek Heirloom Seeds (click here)


Noah says “Save some Seeds, Man!”

I’m completely in love with my Amish Paste Tomatoes, and their seeds are the first I’ve ever attempted to save. Since March I’ve tended them; they grew in my heart more and more as the summer progressed, and repaid my efforts with a harvest that just never seemed to end. They’ve proven to be just the most perfect, all-round tomato in my opinion; perfect for slicing and for preserving. The pictures below show the very simple process. Don’t be afraid of the mold; it’s an important part of the process that helps break down the goop around the seeds and sterilizes them.


I needed three tomatoes for a recipe. Click here to make the recipe;you will not regret it.


Slice tomato in half, and simply scoop out all the goop and seedswith your finger into a small container (I used a small Mason jar).


Slice further into quarters to make sure you’ve found all the pockets of goop/seeds.


The goop and seeds will form a tiny layer in the bottom of your jar.


Cover with a lid that has breathing holes (I used a coffee filter),then put on a counter or windowsill…leave it alone for a few days.
Several days later, you’ll have a layer of mold on the top.


Scoop the mold off the top…


then pour seeds and goop into a strainer over the sink.


While rinsing, stir seeds around on the strainer to remove all goop.


Tap the strainer upside down over a paper towel or coffee filter to get all the seeds out.


Gently spread the seeds around to dry.


Place the seeds in a dry place until fully dried; I put mine in a sunny windowsill.


They are dry when they no longer stick together. I had to gently peel some of mine off the coffee filter.I could see cute fuzzy hairs on the seeds, showing me they were completely dry.


I used an old baby food jar to put all the seeds in. Be sure to label your container.


Voila! Seeds for next year!


Categories
Urban Gardening Using your Harvest

Showing the Love for our Puny Potatoes

Check it out! We harvested our potatoes!

Craig saw the above picture before he saw the actual potatoes. When he saw them in person, he started laughing. “Wow, those are some tiny potatoes. In the pictures they looked bigger, like…real potatoes.” I beg to differ, Mr.! They may all fit in my hand at once, but we are proud of these tiny spuds, and let me tell you why:


1). They are our first attempt ever at growing potatoes.

2). They grew in a pot…yes, a pot!

3). We didn’t even use potato ‘slips’ (pieces of potato with roots roots growing out of, which most gardeners buy especially for planting). We used an old sprouting potato from the pantry (click here to see us planting them).

4). This is just enough potato to make our favorite soup for lunch! (soon we will have our own peas to add to the soup, as well)


Better Than Campbell’s Alphabet Soup-Click Here for recipe!


 Having success, even if small, is wonderful for boosting confidence. To the seasoned gardener, our tiny potato harvest may seem silly. However, the excitement we felt uncovering potatoes for the first time was akin to opening Christmas gifts– it was indescribable! We had waited for months, never knowing if something was forming under the soil in our big white pot or not. As we uncovered the brown tubers, we practically squealed. Or maybe that was just me. No, I’m pretty sure at least one of the kids squealed, too. 😉


We all have to start somewhere…and now that we know it is possible to actually get potatoes using a container, we are motivated to try it again next year, perhaps using a bigger container(s), and using actual potato slips. Puny potatoes=huge success, in my eyes!

Using Teamwork to drag our pot of potatoes to the side garden, so we could dump it out


It was quite heavy! But these kids were determined!


Taking a breather before dumping it into our garden bed


The hidden treasures!!! 🙂


We put our treasures into the now empty pot. Hmm, what can we plant in there now? 😉


Categories
Uncategorized Urban Gardening

Use Your Blender for (Almost) Instant Compost

Here’s an interesting way to ‘compost’ your extra kitchen scraps! Found this over at Attainable Sustainable (a really cool site, check it out!).

What if you don’t have a lot of space for composting? Your leftover salad greens, apple cores, egg shells, and gnarly vegetarian leftovers can go straight to the root of your garden when you use this method, which is ideal for urban gardeners.

Toss compostable items into your blender so that it’s about a third full. Fill the container with water and blend until very finely chopped. Walk out to the garden and with a trowel, dig a small hole alongside a garden plant and pour some of the contents of the blender in. Cover with dirt and let the worms and microbes go to work. One blender full will fill three small holes (or, of course, one larger one). It’s so easy, I even did it single-handedly (LEFT-handedly) so I could take a video:

Note: Only you know what your blender can handle. If you’re not sure if yours will tackle a whole, wilted sweet potato, you should probably skip it.


Categories
Diagnose your Plant Problems

Yellow Does Not Become You

I’m talking to you, cucumbers.


Pretty, but….


Yellow may look wonderful on our sunflowers and our pear tomatoes, and even on our yellow peppers. We always wanted to try yellow ‘green’ beans and are planning to try those next year. But yellow cucumbers are not a delicacy! Unless, of course, the variety of cucumber is supposed to be yellow, like this one or this one. However, in our case, we did not have one of those special varieties, we had planted regular old green garden cucumbers.


We noticed they were looking yellow, and because I am still new to gardening, I assumed they were supposed to be yellow. I picked one, brought it in, sliced it…it all looked quite delicious. Until the first bite. Bitter, dry, and disgusting! Granted, harvest time is late. I should have picked the cucumbers when they were still green; most cucumber plants are long finished by now.


Not tasty!

So, first and foremost in avoiding yellow, bitter (although admittedly pretty) cucumbers, PICK THEM!


Leaving the cucumber on the plant too long is not the only reason that cucumbers can turn yellow. I found the following information in a gardening question/answer page, and will keep it in mind for next year. Hopefully I’ll only ever have to deal with making sure I harvest the cucumbers on time, but these answers will be good to know if needed!


  • My cucumbers do not turn green; they are yellow and bitter. This is the second year this has happened, the fruit is large, the plants have many flowers, and are producing, but this yellow cucumber is all we get.What can I do to correct this, or do I just give up?

 
This happened to me when I planted squash plants near my cucumbers. They cross-pollinated and the results were off-color and not tasty.


  • I have planted pickling cukes and they are turning yellow and they are almost shaped like a ball, round. Can you tell me why they are yellow?

 
Rounded cucumbers especially pickling cucumbers, mean that your soil is missing key nutrients, also poor irrigation can cause this problem. I learned this the hard way “by it happening to me!’ My suggestion is to get a soil testing kit to find out what nutrients you are lacking. Also if your soil is hard and poor quality it can cause the water and fertilizer you put on not to soak enough into the roots. make sure to soak them deeply and often if your soil is hard. I would suggest next year to put in some soil ammendments, like some top soil, natures helper soil conditioner, garden lime and maybe even a little sand, to raise the ph and loosen it up a bit.


  • My cucumbers are blooming and producing cucumbers but when they become about an inch long the bloom falls off and the cucumber turns yellow and dries up. What is going wrong?

 
Most likely they have worms inside. Cut one open and make sure that they are not being eaten from the inside out.


  • We have healthy looking plants, but the cucumbers turn yellow and fall off. Why?

 
I had this same issue this year and read that it could be the lack of calcium! I had a small bag of gypsum from last year and spread it around the plants and now they are starting to take off! You can also clean your used egg shells, let them dry and crumble around the base of the plants!

Categories
Urban Gardening

Lingering Promises


Summer is winding down and many of our plants are closing up shop. Frost will be right around the corner. We miss our green beans; they stopped producing a couple of weeks ago. Most of our herbs are looking very bad, or are completely wilted away. Some of our plants, however, are thriving, and promise to deliver, soon! They keep the excitement of the warm summer alive for us!

Soon we will be looking for ways to extend our harvest into the colder weather. Stay tuned! 😉


Will we finally have peas, after 2 previous failed attempts?


Tigger Melon gets bigger each day


Of course, we still have some beautiful red tomatoes


Yellow pear tomatoes, which grew entirely on their own this year (love those little surprises!)


Beautiful eggplant!


There’s another little one peeking out behind


Our potatoes in a pot; we have no idea if anything has grown ‘underground’…stay tuned for the harvest!