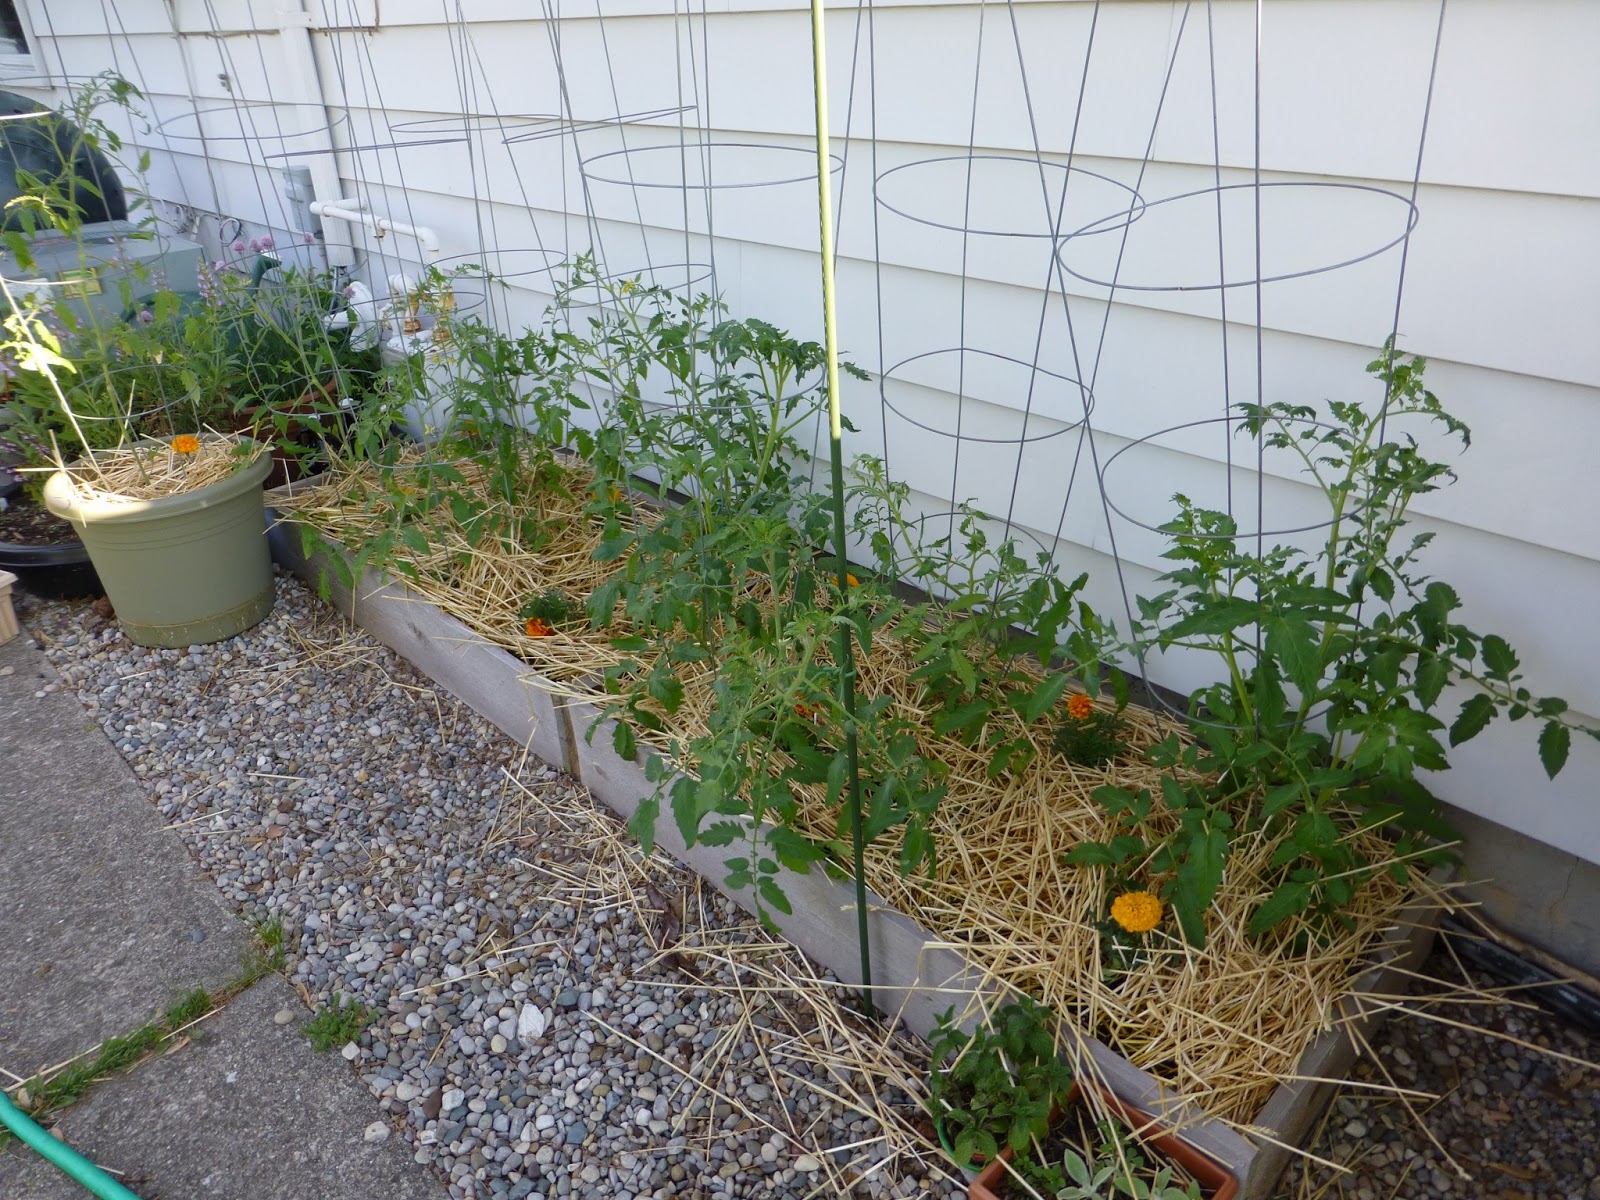
I am a big fan of raised garden beds. They give you a real advantage when it comes to soil conditions, since you get to control the quality of their contents (think lots and lots of good compost). Our south garden consists of raised beds on top of nothing but rocks, and our plants thrive there! Raised beds can be constructed out of almost anything you can come up with, or even made with nothing at all (you can simply make large mounds of compost/soil over your existing space). Do a Google Image search for ‘raised garden beds’, and you will be amazed at the variety of beds that people come up with.
This is a good, basic article on some different ways to make raised garden beds.
How to Make a Raised Bed Garden
By Colleen Vanderlinden, About.com Guide
What is a Raised Bed Garden?
A raised bed garden is a garden built on top of your native soil, sometimes incorporating native soil, sometimes not. These gardens can be contained, such as when you build a wood or stone structure to keep the bed intact, or they can be more free form, with soil and amendments merely piled several inches high. You can plant anything from herbs and vegetables to perennials and shrubs in a raised bed.
Advantages of a Raised Bed Garden
Aside from avoiding the issue of gardening in poor soil, raised beds offer several advantages:
- They warm more quickly in spring, allowing you to work the soil and plant earlier.
- they drain better.
- The soil in raised beds doesn’t get compacted, because they are constructed with accessibility in mind.
- It’s easy to tailor the soil for your raised bed to the plants you plan to grow there.
- After the initial construction process, less maintenance is required than there is for conventional garden beds.
How to Make a Raised Bed Garden
Contained raised beds are the most popular type, and they’re great for vegetable and herb gardens, as well as flower gardens. Fruits, such as strawberries, grapes, blueberries, andraspberries, also do very well in a this type of bed.
You can choose from a variety of materials to construct your frame. Wood is a very popular choice, because it is easy to work with and it is inexpensive. Concrete blocks, natural stone, or brick are also nice options, but there is definitely an added expense and labor to consider in using them. Some gardeners go the ultra-simple route, and simply place bales of hay or straw in whatever configuration they desire, then fill it with good soil and compost and plant it up. This solution will only give you a year or so of use, because the straw will decompose, but it’s worth trying if you don’t mind replacing the bales yearly, or if you’re still developing a more permanent solution.
Since most contained raised beds are constructed from wood, here are instructions for building your own wood raised bed garden.
Step One: Select your site. If you know that you’ll be growing vegetables or herbs, or sun-loving flowers in your new garden, select a site that gets at least eight hours of sun per day. A flat, level area is important, and you should also make sure that the area has easy access to water sources as well as room for you to work.
Step Two: Determine the size and shape of your garden. Make sure that you can access all parts of the garden without stepping into the bed. One of the main advantages of a raised bed is that the soil doesn’t get compacted the way it might in a conventional bed because they are planned for accessibility. It is a good idea to keep the garden to around four feet wide, because this way you can access the middle of the bed from either side. If you’re placing your bed against a wall or fence, it should be no more than three feet wide. Any length you like will work, as long as you keep the width in control. In terms of depth, six inches is a good start, and many vegetables grow well in a bed that is six inches deep. As with many things, though, if you can do more, more is better! Ten to twelve inches would be ideal. If you have decent subsoil (not too clayey or rocky) you can simply loosen the soil with a garden fork and build a six to eight inch deep bed. If your soil is bad, or you are planning to grow crops like carrots or parsnips that need a deeper soil, your bed should be at least ten inches deep.
Step Three: Prep Your Site. Once you know the size and shape of your bed, you can get to work prepping the site. How much prep you will have to do is determined by the depth of the bed you’re planning, as well as the plants you’re planning to grow there. If you are planning a vegetable or herb garden, a six-inch deep bed is perfect. To save yourself some labor, you can use newspaper, landscape fabric, or cardboard to cover and smother it, then put your soil and amendments right on top. However, to ensure that your plant’s roots have plenty of room to grow, it is a good idea to dig out the existing sod and loosen the soil with a shovel or garden fork to a depth of eight to twelve inches.
Step Four: Construct the Bed. Using rot-resistant lumber such as cedar or one of the newer composite lumbers, construct your bed. Two by six lumber is perfect, as it is easy to work with and will give you six inches of depth. Cut your pieces to the desired size, then attach them together to make a simple frame. You can attach them in a variety of ways. You can make a simple butt joint at each corner, pre-drilling and then screwing the corners together with galvanized screws. You can use a small piece of wood in the corner,and attach each side to it.
Step Five: Level Your Frames. Using a level, make sure your frame is level in all directions. This is a necessary step because if your bed is not level, you will have a situation where water runs off of one part of the garden and sits in another. If part of your frame is high, just remove some of the soil beneath it until you have a level frame.
Step Six: Fill Your Garden. The whole point of a raised bed garden is that it gives you the opportunity to garden in perfect soil. Take this opportunity to fill your bed with a good mixture of quality topsoil, compost, and rotted manure. Once they’re filled and raked level, you’re ready to plant or sow seeds.
Maintaining a Raised Bed Garden
Happily, raised beds require very little maintenance. Each spring or fall, it’s a good idea to top dress with fresh compost and manure, or, if your bed only holds plants for part of the year, go ahead and dig the compost or manure into the top several inches of soil. As with any garden, mulching the top of the soil will help retain moisture and keep weeds down. Moisture retention is important, because raised beds tend to drain faster than conventional beds.
Original Article found HERE