Categories
Agriculture Beneficials in the garden Garden Tips and Ideas Organic Gardening Self-Reliability Sustainability The Science Of Growing

Better Yield and Soil Health with Intercropping: The Benefits of Growing Crops Together

Intercropping is a farming technique in which multiple crops are grown together in the same field. This method has been used for centuries and has numerous benefits for the soil, crops, and the environment.

Here are some of the benefits of intercropping:

  1. Increased Yield: Intercropping can increase yield by making the most efficient use of available space, light, and resources. By growing multiple crops together, farmers can make use of different root systems, growth patterns, and nutrient requirements to optimize their use of the land.
  2. Soil Fertility: Intercropping can help to improve soil fertility by adding organic matter to the soil and fixing nitrogen. Leguminous crops, such as beans or clover, can help to fix nitrogen in the soil, which can be used by subsequent crops.
  3. Weed Suppression: Intercropping can help to suppress weeds by competing with them for light, water, and nutrients. This can make it easier to control weeds and reduce the need for herbicides.
  4. Pest Control: Intercropping can also help to control pests by attracting beneficial insects, such as ladybugs and lacewings, which feed on harmful insects. Additionally, different crops can have different susceptibility to pests, so intercropping can help to reduce the spread of pests.
  5. Biodiversity: Intercropping can help to increase biodiversity in the agricultural landscape, which is important for the health of the ecosystem. By growing multiple crops together, farmers can promote a healthy and diverse ecosystem.

In order to get the most benefits from intercropping, it is important to choose the right crops for your area and to plant them at the right time. It is also important to consider the specific needs of each crop and to carefully manage the intercrop mixture.

By incorporating intercropping into your agricultural practices, you can help to increase yield, improve soil fertility, suppress weeds, and control pests. Whether you are a small-scale farmer or a large-scale producer, intercropping can be a valuable tool for improving the health of your soil and the environment.

Categories
Agriculture Composting Garden Tips and Ideas Organic Gardening The Science Of Growing

5 Organic Farming Techniques for a Thriving Harvest

Organic farming is a method of agriculture that prioritizes the use of natural processes and materials to cultivate crops. This approach not only benefits the environment, but also results in healthier and more flavorful produce. Here are five organic farming techniques to help you achieve a thriving harvest:

  1. Cover Cropping: Cover cropping is a technique that involves planting cover crops, such as clover or rye, in between harvest cycles to add nutrients back into the soil, suppress weeds, and improve soil structure.
  2. Composting: Composting is the process of breaking down organic material, such as food scraps, yard waste, and animal manure, into a nutrient-rich soil amendment. This technique adds essential nutrients back into the soil and helps improve soil structure and water retention.
  3. Crop Rotation: Crop rotation is a technique that involves rotating crops from year to year in order to minimize pest and disease pressure, improve soil fertility, and prevent soil depletion.
  4. Intercropping: Intercropping is the practice of planting two or more crops together in the same field. This technique helps to improve soil fertility, suppress weeds, and increase overall yields.
  5. Natural Pest Management: Organic farmers rely on natural pest management techniques, such as companion planting, releasing beneficial insects, and using natural pest repellents, to control pests and diseases. These methods are safer for the environment and more sustainable than using chemical pesticides.

By incorporating these five organic farming techniques into your farming practices, you can achieve a thriving harvest while also benefiting the environment and promoting sustainable agriculture.

Categories
Container Gardening Garden Tips and Ideas Urban Gardening

Container Gardening: Top 10 Reasons To Grow in Containers.

I love container gardening. As spring approaches, now is the time I get all my containers ready and even do some spring growing. Container gardening can be a solution to many problems, and is quite enjoyable.

Container Garden

I am sure you have seen or read people talking about container gardening. This can be as complex as a raised bed garden or as simple as a window herb garden. No matter your needs container gardening can likely fill the gap in your garden design and grow season. So in this article we are going to cover some of the basic uses and advantages of container gardening.

Space

– One of the largest reasons to start a container garden is space, be it an odd space or lack there of. You can build raised beds or design a container garden to fit in almost any area.


Soil


– If you live in the city, or even the suburbs your soil may be contaminated. Even if it is not it may not have a good PH or proper soil composition for growing in. You can test your soil for components like Ph, Nitrogen, Potassium, and Phosphorus fairly cheaply and easily with a home test kit. However other contaminants such as motor oil or herbicides like Round Up are commonly found in city yards and are harder to detect right away, and cost a lot more to test for. Container gardening solves this problem by letting you control the soil composition to a fine point. It can make gardening easier and also more productive. Books such as “Square Foot Gardening” can help you get the perfect soil composition.


Square Foot Container Gardening


Water

– If you live in a region where water is scarce, container gardens and hydroponic gardens can be water saving solutions for the home vegetable grower. They take and hold water at a better rate than watering a whole garden patch.


Children

– If you have children, you can do SO many projects with them. They will find container gardening easier for small hands and short legs, and they will find a great sense of responsibility and reward in caring for their own plants.


Run Off

– One of the bigger problem with many urban gardens is runoff. When nitrates and other fertilizers are leached by rain, they tend to run into sewer and river systems. This has caused dead zones in rivers and lakes, even the ocean. A lot of runoff is from lawns, so growing food in containers is one way to eliminate the lawn and to add home grown food to your diet.


Landscaping

– Container gardens come in all shapes and sizes, making them sometimes decorative. what a great way to add some decoration to your lawn while also growing some great fruits, vegetables or flowers.


Convenience

– You can grow an small vegetable or herb garden inside or out and have fresh cooking herbs at your disposal at any time. And if you live in a cold climate like I do, an indoor winter garden can be cheaper, easier to fit in a small space and easier than a greenhouse


Portability

– If you live in a rental home or just like to change things up sometimes, only container gardening offers the flexibility to move. You can rearrange, replace or move anytime you need to, with little or no losses.


Control

– If you have ever grown certain types of plants such as mint or strawberries, you will know they can take over a garden. Growing these in a controlled garden you can keep them to their own area and not have a whole garden of mint after a year or two.


Maintenance

– When it comes to weeding, I find that raised beds and other containers are MUCH easier to weed. This is also true if you need to change out or amend soils or anything else.


All of this does not have to replace in the ground gardening, but it can do pretty well. Container gardening is especially valuable for people who have limited space or no yard at all. So check it out, maybe get some grow bags and try it, but most of all have some fun and grow some food!


Categories
Agriculture Beneficials in the garden Garden Tips and Ideas Nature Organic Gardening Sustainability The Science Of Growing Urban Gardening

Azospirillum Brasilense Bacteria (Azos) And Why Every Gardner Needs It.

Once again this is an example of how one must feed the SOIL not the plant. Nature has already thought of everything you need and provided it somehow, all you have to do is learn to restore what has been lost. Many fungi and bacteria have been killed off by spraying and other pressures of modern Western life. So here is a knowledge bomb of one of the hardest working bacteria in your garden, and maybe on the planet,

Azospirillum Brasilense, commonly referred to as Azos or A.Brasilense, is one of the most well-studied plant growth promoting bacteria. It is considered a free-living soil bacterium that has the ability to affect the growth of numerous agricultural crops worldwide through the excretion of various hormones and the bacteria’s ability of nitrogen fixation.

Pull Nitrogen From Thin Air.

Even though you and I breath oxygen and plants breath carbon dioxide, the atmosphere is actually comprised of around 80% nitrogen which is in the form of N2 atmospheric nitrogen that is not conventionally available to plants. Nitrogen is a key component in growing anything. it drives chlorophyll production keeping the plants dark green and happy. It is a huge part of amino acids and other compounds that keep your plants strong and healthy. It is a part of every major protein molecule, and yet soil is often lacking enough N. Chemical fertilizer could provide this N, but they are expensive and can be dangerous.


Somewhere along the evolutionary development of the “Plant – Soil – Microbial Matrix”, certain bacteria began to specialize in tasks to enhance plant growth, which in return provided the microbes with a food source exchange opportunity.  A select group of bacteria classified as “Diazotrophs” began to supply nitrogen to plants from a range of sources, including decomposed plant litter, dead micro-organisms, and sequestration of atmospheric nitrogen.

Azos is a particularly efficient agent originally isolated in the Amazon Basin where the lack of soil, the reapid breakdown of any vegetation by hungry microbes, and the environmental conditions which require growth to survive is a fundamental proposition of the ecosystem. Azos specialized in the highly-efficient conversion of the N2 form of nitrogen into plant-available NH3 ammoniacal nitrogen. Azos is so efficient that between 50-percent and 70-percent of all the nitrogen required by most crops can be supplied by this organism. Azos benefit to plants is not limited nitrogen-fixation alone. Azos also acts as a growth simulant, catalyzing the release of a natural growth hormone in plants. This naturally-released hormone increases root development and optimized the harvest potential of your garden. Together, Azos and mycorrhizae fungi work symbiotically to help ordinary plants become the fullest they can be (read about mycorrhizae in this post).

Azos can be used as a cloning solution, though I have not tried it personally.

So grab some for your spring transplants and improve your crop this summer.

Categories
Agriculture Beneficials in the garden Garden Tips and Ideas Nature Organic Gardening Sustainability The Science Of Growing Urban Gardening

Top 5 Reasons To Use Mycorrhizae, Friendly Fungi And Fabulous Friends For Gardeners

Do you want way to naturally and organically produce more food from your garden or farm. Well, nature provides. Mycorrhizae is a fungi that will rock the roots of most plants and show a HUGE gain in size and yield. In combination with Azos bacteria, the two can nearly grow a plant in anything. So here is some info and The Top 5 Reasons To Use Mycorrhizae.

Top 5 Reasons To Use Mycorrhizae In Your Garden.

5. Can give your plants up to 10000% more root mass (yes 10000%!)

4. It makes a plant heartier and more resistant to drought, pests and disease.

3. Use less water to grow even better plants.

2. Use less compost and fertilizer, meaning less work, energy and waste go into your garden.

1. Plant yield and growth will explode!

Runner Up: They look really cool when you see them pop up on your seedlings.


Mycorrhizae (or Myco’s for short) form a mutually beneficial relationship with the roots of most plant species. Let me simplify the science. The fungus colonizes roots of plants and breaks down certain nutrients for the plant, in return for those nutrients the plant feeds the fungus the sugars it so craves, its just a fungus with a sweet tooth looking for its next fix, which it is willing to work for.  The mechanisms of increased absorption are both physical and chemical. Mycorrhizal mycelia, tiny little hairs which you can see on the roots, are much smaller in diameter than the smallest root, and thus can explore a greater amount of soil, providing a larger root mass for absorption of water and nutrients. While only a small proportion of all species has been examined, 95% of those plant families are predominantly mycorrhizal. And here is the real kicker, it may be myco’s that allowed waterborne plants to move to the dry land many millions of years ago!

Mycorrhizae should be everywhere, but due to pollution, runoff, pesticides, herbicides and anti-fungal sprays, mycos are missing in many gardens and raised beds, not to mention all indoor potted plants that are started with sterile soil.

Two Types, Two Jobs, Too Easy

There are two types of mycos, endo and ecto. Rather than bore you with my poorly explained science, I will simply tell you that endomycorrizae are for most vegetable and fruit species in your garden (spinach and lettuce type plants do not colonize with it, though it will not hurt them either), and ecto are for a lot of trees and some flowers such as roses and orchids. I just generally get a mix of ecto and endo so that it can both colonize the plant I am planting and rebuild the soil by possibly colonizing other areas and plants.

Technically there is a third type, but it is for bogs and not commonly sold or needed.

You can spray on myco, you can use it as a root inoculate when you transplant or plant, or you can “drill’ a small hole in the soil and spray or sprinkle some in the hole for existing plants. The key is to get it in contact with the roots.

So have heavier yields with less fertilizers and compost for less than $20 an acre. And I will give you a little tip that the guy at the garden center may not. You can use a small amount of myco and culture it in your potting soil, use it in house plants and then put that medium in the garden when done recycling the myco or you can even grow your own with certain grasses etc, but I just find it easier to buy a box or two a year (about a pound) for our whole farm to use.

Here is a good video if you want more info, the more you know, the more you can grow.
[youtube]https://www.youtube.com/watch?v=uOiaFQCcH6s[/youtube]

Research shows that the lack of mycorrhizal fungi can create problems with many plants, shrubs and trees when they are growing in our gardens, so make sure you get some before this spring.


Categories
Garden Tips and Ideas Urban Gardening

I Never Knew That! -Sweetgum Balls

sweetgum ball

I Never Knew!

You know, the super magical thing about the internet is that it can make you the bearer of almost instant knowledge on just about anything. This comes in handy when you hang out with kids. The ‘aha, I never knew!’ moments are exhilarating.


For instance, yesterday I finally looked up ‘tree with spiky balls.’ Yeah, I giggled a little inside at the search terms. However, the search is long overdue; we’ve taken hundreds of walks in our neighborhood and have run into the same patches of ‘spiky balls’ countless times. On our typical route, there are 3 trees that bear these weird little balls. I’ve twisted my ankle on them more than once; when I’m pulling a wagon full of kids, they can make travel difficult; Simon has crashed his bike more than once when his front tire hit one. Despite these nuisances, we always slow down to take a look, and to collect the unusual alien balls–we always end up with pockets full and fists bulging because they really are just amazing things to study.


Sweetgum tree with seeds


It wasn’t until yesterday, after a walk along the snowy sidewalks when we gathered a few of these funny spiky sweetgum balls, and Noah said ‘What are they called?” that I decided it was time to find out! Incidentally, he has become so fascinated with all the things in our compost, that he added “Can we put these in our special trash to turn them into dirt?” We are always in need of brown stuff (carbon rich things like dead leaves and straw), so I was thinking, hmmm, maybe!


Turns out, they are the seed pods from the sweetgum tree. Green in the spring, they darken as autumn and winter pass, and they fall from the sweetgum by the hundreds. If you look very closely, they are actually a bit scary looking–they appear to be made of a collection of tiny, dark brown bird beaks. Noah is the one who make the beak connection, and once he did, he was too freaked out for awhile to touch his ball again. He got over it. 🙂


Noah and sweetgum ball


Here is something interesting to pass along: The sweetgum doesn’t even start producing the seed pods until they are TWENTY years old! That will widen the eyes of any curious kid!


Six Great Things To Use Sweetgum Balls For:

The spiky seed pods from the sweetgum tree are not only fascinating to look at, they can actually help out in the garden. Who knew?! Go out with a bucket and fill it with seed pods, and in the spring you may just use some:


1. Lay the seed pods around young plants to deter snails and slugs who would rather not tangle with them


2. Put them around plants that you also want to protect from rabbits (press the spikes in the ground a bit so they don’t blow away)


3. Use them as mulch (you can’t have too much mulch!)


4. Like Noah suggested, you can always throw them in your compost for some much needed brown material. However, they will take a long time to compost


5. Use them in the bottom of planters as the drainage filler instead of stones


6. If you have hard, compacted soil that you are trying to amend, dig deep and place a thick layer of the seed pods down to help aerate and drain–cover back up with soil and other amendments


The pods would also be great for making wreaths or ornaments. They have a natural beauty to them, even if they do look like weird little baby bird beaks.


If you walk by a sweetgum tree like we do almost every day, now you know they can be useful for more than twisting your ankle or causing a bike wreck!


P.S. If you are feeling really motivated, get on ebay and sell some like these folks are! I’m totally kidding. Maybe.

Via: Andrea @ Little *Big* Harvest


Check ot other posts in urban gardening.

Categories
Garden Tips and Ideas

Fast Friday Tip-Tomatoes on Newspaper

When you are collecting tomatoes every day, they start taking up a lot of counter space. As they wait for their end (eaten fresh, juice dripping down your chin? sauced? roasted?), set them out on a layer of newspaper. Make sure each tomato has its own little space (try not to stack them), and the newspaper will help with airflow so the tomatoes continue to ripen, not rot.

If you have a silly tomato with a nose, by all means, dress it up and hide it among the others. The reaction from passersby is awesome.

These tomatoes are waiting to become sauce! Stay tuned!


Categories
Garden Tips and Ideas

Fast Friday Tip: Panty Hose Tomato Ties


Don’t spend another dime on fancy tomato ties from the garden center! Panty hose work perfectly for the task of keeping wayward vines trained where you want them.


I’ve always kept store-bought ties like the ones pictured below on hand, but always felt like I had to ration them out. The cost can really add up when you only get a dozen or so in a pack that cost 2 or 3 bucks. The cable ties on the far left are essential for other garden tasks, but can cut into the tender skin of your tomato vines, leaving them injured and susceptible to disease.


 I personally don’t wear panty hose, but bought some just for this purpose. This pair cost me only a dollar (at the handy dollar store within walking distance from me) and will give me dozens of ties.


Just take the panty hose and cut a length from it. It will stretch out and tie easily around your vines. The material is soft and gentle and you won’t have to worry about the homemade ties cutting into the vine and hurting your plant.


Now go search your drawer for some old hose you know you are never going to wear again, and tie up some tomatoes!


Categories
Garden Tips and Ideas

Fast Friday Tip: Lettuce Lattice

Lettuce lattice….trying saying that 3 times fast! Okay, I just did. It’s not actually very difficult. 🙂


Even less difficult is using scrap lattice in your garden. This is a very simple idea I found to help protect your lettuce (and other more heat-sensitive veggies and herbs) from extreme sun. Filtering the sunlight a bit will prevent lettuce from quickly going to seed and becoming bitter. If you know of anyone getting rid of some lattice board, try this; or even purchase some, it’s relatively inexpensive!


Here’s another example, using white plastic lattice (the white will reflect more sunlight):


Source of photos HERE and HERE

Categories
Garden Tips and Ideas

Sturdy Tomato Trellis

Earlier in the spring I’d posted a short note about making a cat’s cradle for tomatoes. Though I am still using cages in my raised beds, I’m always looking for ideas for when my garden will expand into bigger areas. I found this detailed plan for a very sturdy looking tomato support system. The materials are simple, but look really effective. Saving for later reference!


One of the most aggravating things about growing tomatoes is finding something that will actually support them.

Unfortunately, the cages and stakes you find at garden centers and big box stores never seem to cut the mustard. They work great for the first two months, but once the plants mature it’s almost a guarantee that the tomatoes will end up on the ground.

One day while browsing one of my favorite vegetable gardeningsites, Kenny Point’s veggiegardeningtips.com, I came across a really neat tomato trellising idea. Kenny had a video demonstrating his tomato trellis and how it worked. It was a very simple, yet very promising way to support tomatoes.

I decided that I had to build a tomato trellis for my vegetable garden like the one Kenny used.

The Tomato Trellis

How to Build an Easy Tomato Trellis

What I liked about Kenny’s trellis is that it looked so easy to build and didn’t require any special tools and equipment. It also looked like you could set it up very quickly.

Simple and quick. That’s what I’m talking about!

Here’s a list of materials you will need to build the tomato trellis:

Fence T-posts

You will need to use the green T-posts normally used for fencing. How many you need will depend on how many tomatoes you are growing and how long a row you have.

I would recommend using as many T-posts as possible, because this is what will support the weight of your tomatoes. Spacing the T-posts between five to eight feet apart should give your tomatoes plenty of support.

To give you an idea of how many you may need, I have a row of tomatoes that is thirty-eight feet long. I used a total of six T-posts spaced out about seven and a half feet apart.

Purchase the tallest T-posts you can find. The tallest T-posts I could find were seven feet tall at Lowe’s. With eighteen inches in the ground that means my trellis will be about five and a half feet tall.

100 ft Roll of Plastic Clothesline

100 Foot Roll of Plastic Clothesline

The plastic clothesline will string between the T-posts to form a “wall” for the tomato plants. The plants will be tied to the clothesline as they grow.

I opted to go with the plastic clothesline because it seemed like it would be easier to work with than the wire. You can also use 14 or 16 gauge wire as Kenny used in his tomato trellis video.

I would avoid using twine or string because I don’t think it would be strong enough once the tomatoes get real big.

Mounting Hardware

You will need some mounting hardware to attach the clothesline to the T-posts. An eye bolt and nut will be needed on one end of the trellis, while a small turnbuckle will be needed on the other end.

I like the turnbuckle because it gives you the ability to tighten the line to get it really snug for supporting the tomatoes. This may be needed later down the road if the line ever starts to sag, you can always go back and re-tightened it up again.

You will need enough eyebolts and turnbuckles to make five to six rows of clothesline. I purchased five eyebolts and turnbuckles. If I need more later I can always go back and get them.

Eyebolt and Nut AssemblyTurnbuckle Assembly

Here’s the complete list of materials for the tomato trellis to accomodate the 38 foot tomato row:

    • 6 – T-posts, seven ft tall
    • 1 – 100ft roll of plastic clothesline
    • 5 – 1/4″ eyebolts with nuts
    • 5 – 1/4″ turnbuckles
  • 1 – roll of string (if needed)

Setting Up the Tomato Trellis

The first thing you should do is place a T-post at each end of the row for the tomatoes. Make sure each post is plumb using a level, then use your foot to drive it into the soil until the small plate on the post is even with the soil level.

If you have compacted soil you may need to use a heavy hammer to drive the post in the ground. Lowe’s also carries a post driver tool if you need it.

Install a T-post on Each End of the Row

With both end posts plumbed and installed, next you will need to run a string from one of the end posts to the other.

Tie the string to one side of the post and run it down to the other post and tie it to the same side of that post.

This string will be a guide so you know where to place the inner T-posts. You want the T-posts to be in a straight line.

Run a String from One End Post to the Other

Now space the inner T-posts equally across the distance between the two end posts. My end posts are 38 feet apart so I will space the four inner posts about seven and a half feet apart. Use the string line as a guide to keep the T-post in a straight line.

Once you have all the inner posts in the proper location drive them in the ground and check to make sure they are plumb.

Again, you want the small plate attached at the bottom of the post to be at the soil line.

Attaching the Hardware and Running the Clothesline

With all of the T-posts installed it’s time to attach the hardware and run the clothesline.

Install an eyebolt in one end post using a hole that is about ten to twelves inches above the ground. It should be the second hole from the bottom. If you want the first row of line to be lower or higher, that’s fine.

Install an Eyebolt In One End Post and Tighten

Go to the other end post and attach the turnbuckle to the same height hole as the eyebolt. Unscrew the eyebolt on one side of the turnbuckle and stick it through the hole in the T-post.

Insert Eyebolt from One End of Turnbuckle Into End Post

Unscrew the other eyebolt in the turnbuckle so it is out as far as it will go without coming out. Screw the turnbuckle back onto the eyebolt inserted in the post a couple of threads – just enough so it will stay on.

You want the turnbuckle extended out as far as it will go before attaching the line so you will have the full range of it for tightening.

Re-attach Turnbuckle to Eyebolt In Post

With the eyebolt and turnbuckle installed on the end posts, tie one end of the clothesline to the turnbuckle and run the line to the other T-post.

Tie One End of Clothesline to Turnbuckle

Leave enough length of clothesline on the other end for tying a knot and cut the line with some scissors or a sharp knife.

Run the Clothesline to the Other End and Cut Length as Needed

Go to the T-post closest to the post with the turnbuckle and begin running the clothesline through the holes in the inner posts that is the same height as the turnbuckle and eyebolt you already installed.

Continue running the clothesline until you reach the T-post with the eyebolt at the other end.

Run Clothesline Through Each Inner Post

Once you get to the end with the eyebolt, run the clothesline through the eye and pull the clothesline tight. You want to get the line as tight as possible, but don’t yank it so hard you pull the T-posts over.

With the clothesline tight, tie the line to the eyebolt. Make sure to tie good knots so they will hold under the tension. My grandfather used to say, “If you can’t tie a knot, tie a lot”.

Pull the Clothesline Tight Then Tie to Eyebolt

Here’s where the usefulness of the turnbuckle comes in. Use a wrench on the turnbuckle to tighten the clothesline even further.

You want to get the clothesline as tight as possible, but it doesn’t need to be super tight.

Remember, you aren’t stringing a banjo here. You just want some decent tension on it.

Use one hand to hold one end of the turnbuckle while tightening with the wrench.

Snug the Clothesline Up Using the Turnbuckle and a Wrench

That’s it!

The tomato trellis is ready for planting tomatoes!

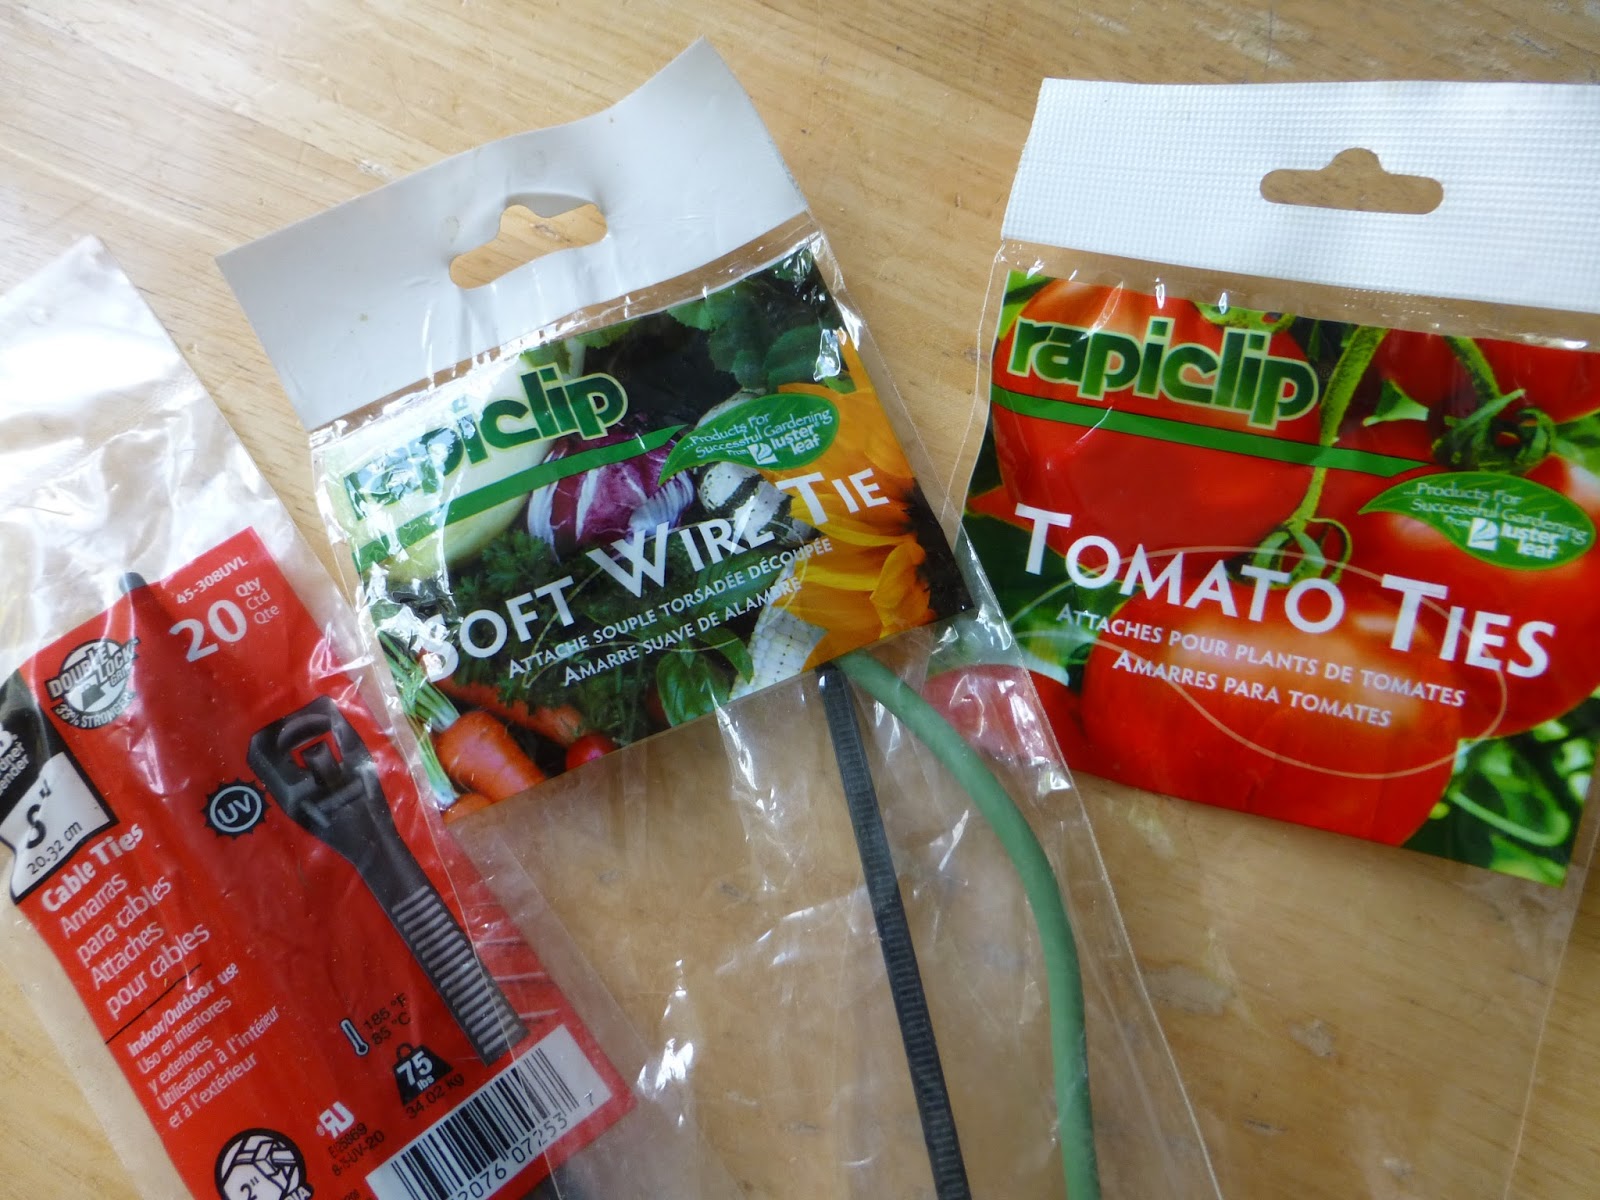
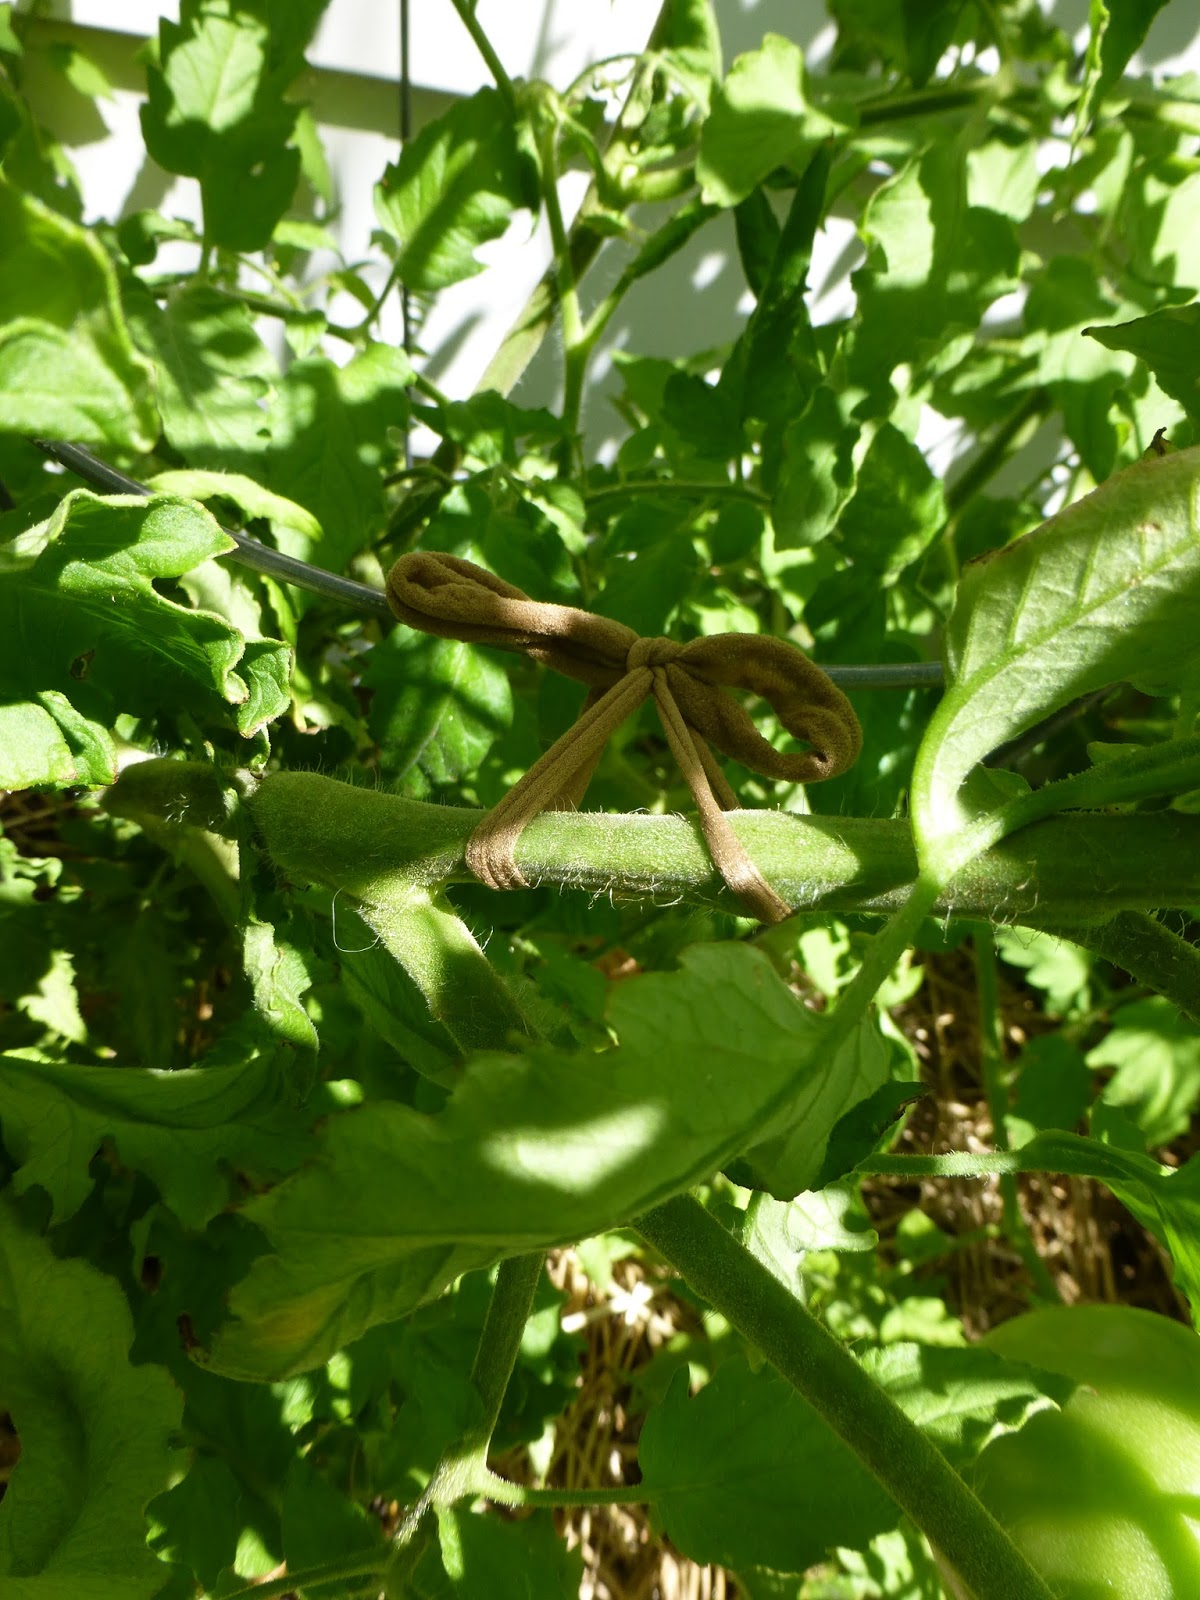
Just repeat the same steps for the next row of line for the trellis and continually add line as the tomato plants grow up. Once the tomato grows to a height above the clothesline simply use twine, old panty hose, or an old t-shirt cut in strips to tie the plant to the clothesline.

Continue this as the plant grows until it reaches the top of the trellis.

Hopefully no more fallen plants.

Hopefully no more flimsy cages.

The Tomato Trellis is Now Ready for Planting TomatoesThe Tomato Trellis with Planted Tomatoes

I think the tomato trellis will work much better than cages or stakes. I believe this is a genius idea and I want to thank Kenny from veggiegardeningtips.com for the awesome idea!

What do you think? Do you believe it will work better than cages or stakes? Please let us know your ideas!


Original article: http://www.veggiegardener.com/build-tomato-trellis/